

Your iPhone already knows how to cut out a photo, without installing a single app. Since iOS 16, you can isolate the subject of an image (a person, an object, an animal) with a simple long press, then copy it elsewhere or save it on a transparent background. It's fast, free, and honestly impressive on simple cases. But this feature has blind spots that show up quickly the moment you want a clean result: hair, thin objects, cluttered backgrounds, or swapping out the backdrop.
In this guide, you'll see the exact steps to remove a photo's background on iPhone, which models and images it works with, what you can do with the subject once it's cut out, where the native method hits its limits, and how to get a precise cutout when your iPhone isn't enough anymore. Zero jargon, clear steps you can test in two minutes.
How Do You Remove a Photo's Background on iPhone Without an App?
Open the photo in the Photos app, press and hold your finger on the subject for a second, then choose "Copy" or "Share": iOS automatically cuts out the subject and removes the background. No third-party app is needed—everything happens in the Photos app that comes with the iPhone.
Here's the step-by-step:
- Open the Photos app and select the image you want.
- Press and hold your finger on the subject (the person, object, or animal) for about a second.
- A faint glowing outline appears around the subject, along with a small menu.
- Choose "Copy" to paste it elsewhere, or "Share" to send or save it.
If you choose "Share," then "Save Image," iOS creates a PNG file with a transparent background. That transparent format is what lets you drop your subject onto any other backdrop afterward. You can also paste the subject directly into a message, a note, or an email, and it'll show up cut out, without its original background.
The feature relies on the image analysis built into iOS. Apple explains how it works in the official documentation on subject isolation. In plain terms: your iPhone recognizes on its own what's "in front" and what's "behind," without you having to trace a single outline.
On Which iPhones and Which Photos Does the Method Work?
The feature requires iOS 16 or later, and an iPhone with an A12 Bionic chip or newer—meaning an iPhone XS (2018) or more recent. On an older model or an out-of-date iOS, a long press on the subject won't trigger anything.
To check your iOS version, go to Settings > General > About, then look at the "Software Version" line. If you're below iOS 16, a free update (Settings > General > Software Update) is enough to unlock the feature, as long as your model is compatible.
As for photos, not every shot is equal. The native method delivers its best results when:
- The subject is sharp and well-lit.
- It stands out clearly from the background (a contrast in color or brightness helps a lot).
- The outlines are simple: a face, a piece of clothing, an object with regular edges.
On the flip side, a dark, blurry photo, or one where the subject is the same color as the background, will cause trouble. The iPhone hesitates, and the cutout outline gets sloppy. Keep this constraint in mind: the quality of the starting image directly determines the quality of the result.
What Can You Do With the Subject Once It's Cut Out?
Once the background is removed, you can paste your subject into another app, save it as a transparent PNG, or turn it into a sticker you can reuse anywhere on your iPhone. The cutout is just one step: what you do with it next depends on your needs.
Three common uses, from the simplest to the most practical:
- Paste it into a conversation or a note. After a long press and "Copy," open Messages, WhatsApp, or the Notes app, then paste. The subject arrives without a background, ready to be placed on another visual.
- Save it as a transparent file. Via "Share" then "Save Image," you get a PNG with a transparent background, handy for a composite, a thumbnail, or an illustration.
- Create a sticker. On iOS 17 and later, the long press offers "Add Sticker." Your subject becomes a sticker available in the keyboard, reusable across all your chats.
These uses cover most everyday needs: sharing a photo of a product without its backdrop, isolating your pet for a birthday card, or preparing a simple visual. As long as you stick to quick, informal sharing, the native method does the job very well.
What Are the Limits of the iPhone's Native Method?
The native feature cuts out fast but roughly: it often misses hair, thin objects, and complex backgrounds, handles only one photo at a time, and can't replace the background with a different backdrop. For personal use it's plenty; for a professional result, it hits a wall quickly.
The four most common limits:
- Tricky outlines. Hair, fur, plant leaves, or wire fences produce jagged edges, with bits of background left behind or parts of the subject chewed off.
- No manual adjustment. You can't correct the outline, soften an edge, or recover a poorly detected area. It's all or nothing: either the result works, or you start over with a different photo.
- No batch processing. Each image is cut out by hand, one at a time. If you have ten product photos to prep for an online store, the method quickly becomes a chore.
- No new background. The iPhone can remove the background, but not add a new one. You can't replace a plain backdrop with a polished scene, cleanly blur the background, or match the lighting between the subject and a new setting.
These limits aren't hidden flaws: they're the normal boundaries of a tool designed to be fast, not to produce a commercial visual. The moment you want a clean cutout on hair, or to actually change the backdrop behind your subject, you need a more complete tool.
How Do You Get a Precise Cutout and Change the Backdrop With AI?
When the iPhone's native tool shows its limits, a specialized AI service takes over: it cleanly cuts out the tricky areas, replaces the background with the backdrop of your choice, and processes your photos without piling up subscriptions. It's the logical next step when you move from personal use to a more polished need (online resale, social media, portfolio).
On Skilzy, the AI Lab builds these background edits right into the Image tab, in the "Background" section. There you'll find three complementary actions, each with a before/after comparison:
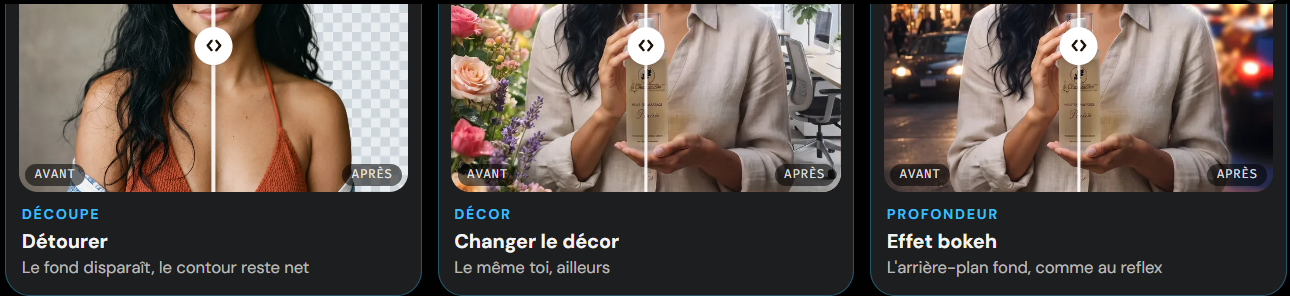
- Cut out: isolates the subject with a clean outline, including on the hair and thin edges the iPhone misses.
- Change backdrop: replaces the background with a new scene, something the native method can't do at all.
- Bokeh effect: cleanly blurs the background to make the subject stand out, like a DSLR lens.
The upside: you use real AI tools from your browser, with credits included, without paying for three separate subscriptions. And most importantly, you learn how to use them instead of fumbling around. Retouching an image, writing good prompts, generating visuals: these are skills you pick up fast when you're guided. You can explore the full set of AI training programs offered by Skilzy, from image cutouts to automation, with two state-recognized, fundable certifications.
If you're a complete beginner, start with the basics: our guide on learning AI as a beginner shows you where to start without getting overwhelmed, and the complete guide to getting started in 2026 lays out the essential landmarks. You don't need to be a graphic designer to get going.
Conclusion
Removing a photo's background on iPhone is within everyone's reach: a long press, and the subject pops out. For quick sharing, stick with this native method—it's free and instant. The moment you're aiming for a clean result on hair, a real backdrop change, or several photos in a row, turn to a specialized AI tool. You gain precision, you stop fumbling, and along the way you build a skill that'll serve you well beyond cutouts.